What Is the Manufacturing Assembly Process of Membrane Switch?
What Is the Manufacturing Assembly Process of Membrane Switch?
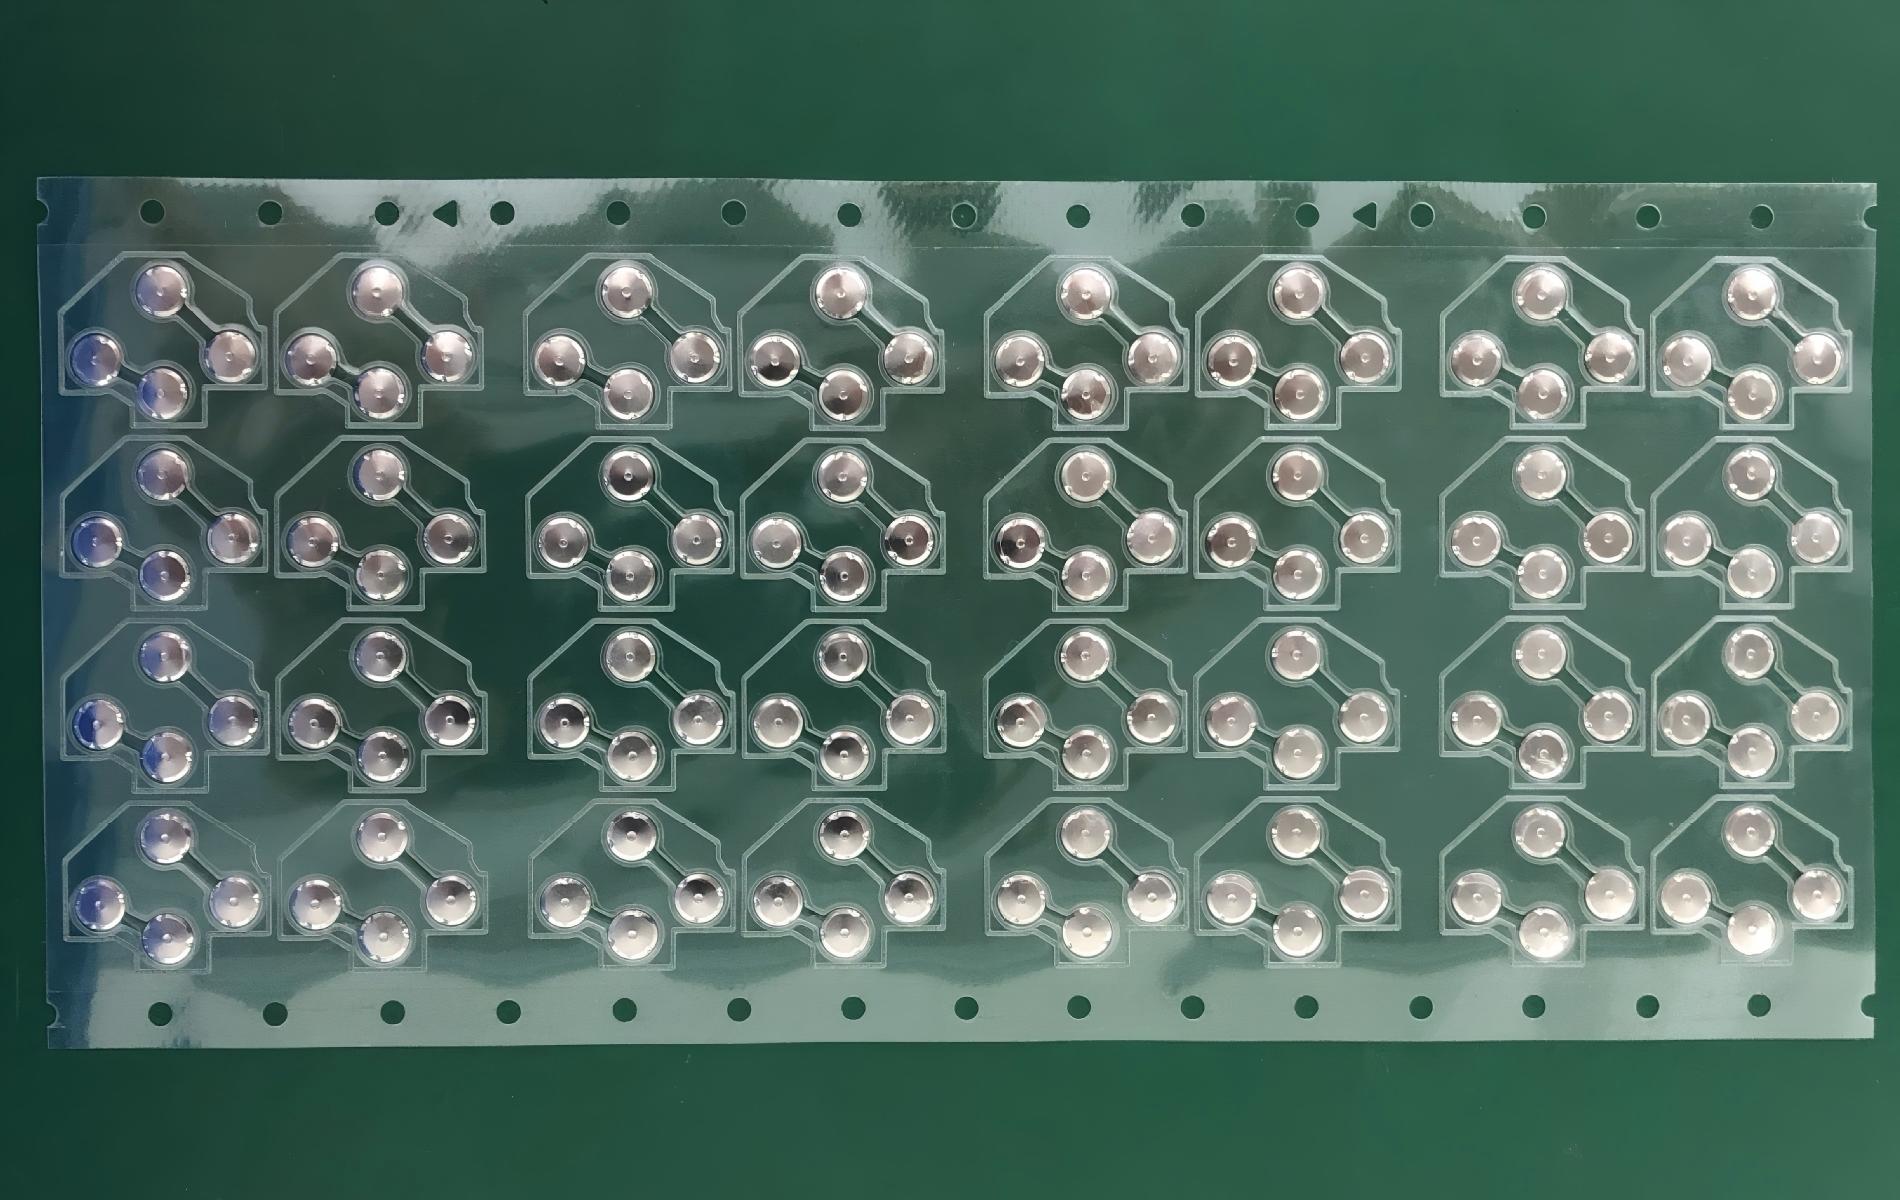
Electronic products in daily life often incorporate membrane switches. Currently, membrane switches offer many advantages over traditional switches, mitigating some of the drawbacks associated with them. For instance, regarding lifespan, membrane switches generally have a longer lifespan compared to traditional switches. Additionally, their usage is convenient, and they boast a high safety factor with a simple structure. In the event of malfunction requiring repairs, understanding the structural principles of membrane switches and the production process is essential.
The general steps for producing a membrane switch are outlined below:
1. Screen-printed circuits are placed in an oven and baked at 115C for 40 minutes. After baking, circuits are assembled and tested for any issues like short circuits, open circuits, or excessive resistance, which are promptly rectified.
2. Tail attachment: The circuit tails are tested for resistance, then affixed with transparent adhesive to overlap the carbon pads by 1mm.
3. Tail cutting: Using a ruler with adhesive, a cut is made from the inside of the tail to its edge.
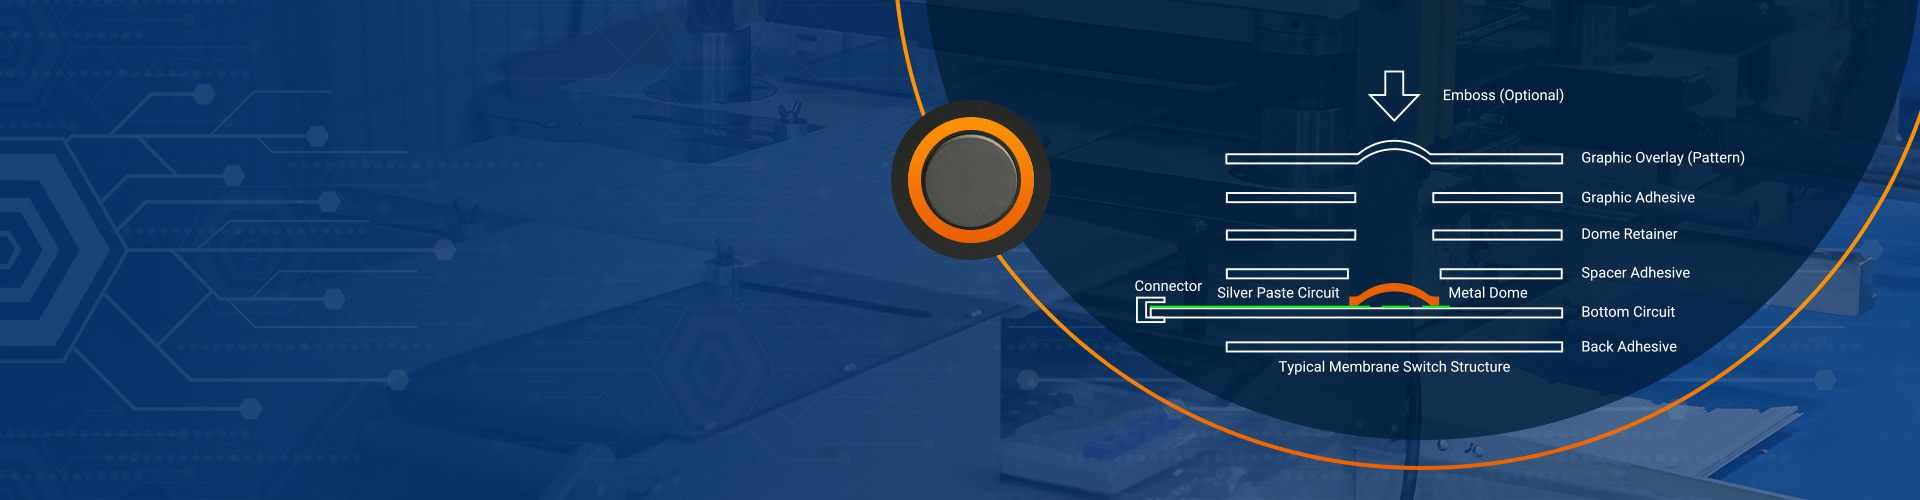
4. Spacer creation: A discarded circuit is laid flat on a suitable spacer, the center of the key positions is marked with a cone, a 10 mm diameter circle is drawn around it, and a 2 mm wide vent groove is cut between adjacent circles. A minimum of 3 connected circles is required, avoiding crossing points of top and bottom circuits.
5. Circuit assembly: The lower circuit is attached to the prepared spacer with silver paste dots aligned in spacer holes, ensuring minimal air bubbles, then the upper circuit is attached.
6. Back adhesive application: The pre-cut backing adhesive is applied to the lower circuit.
7. Front adhesive application: The pre-punched front adhesive is applied to the upper circuit.
8. Hole punching: A discarded panel is aligned and punched 1.5 mm larger around the transparent holes, ensuring no damage to circuits.
9. Panel attachment: The inspected panel is affixed to the upper circuit, ensuring alignment and removing any air bubbles under the adhesive.
10. Tail treatment: Tails are trimmed flat; non-riveted tails receive an additional layer of 0.125mm single-sided PET adhesive, while riveted tails are riveted from the back.
11. Molding: Panels with through-holes are molded using appropriate tools.12. Testing: Visual inspection is followed by functional testing of each key to detect any faults like short circuits or excessive resistance.13. Cleaning, packaging, and shipment.
The manufacturing process of membrane switches is highly customizable and can be adjusted to meet the specific needs of various applications, such as medical devices, industrial controls, and consumer electronics. Advances in materials science and printing technology continue to expand the capabilities and applications of membrane switches.

How Long Does Keyboard Last? Average Lifespan Guide
Understanding how long does keyboard last is not just about numbers—it’s about how design, usage habits, and environmental conditions come together over time. Whether you’re working with a membrane keyboard, a mechanical unit, or a custom membrane keyboard built for industrial use, lifespan varies widely based on real-world factors. How long do keyboards last? Most ...
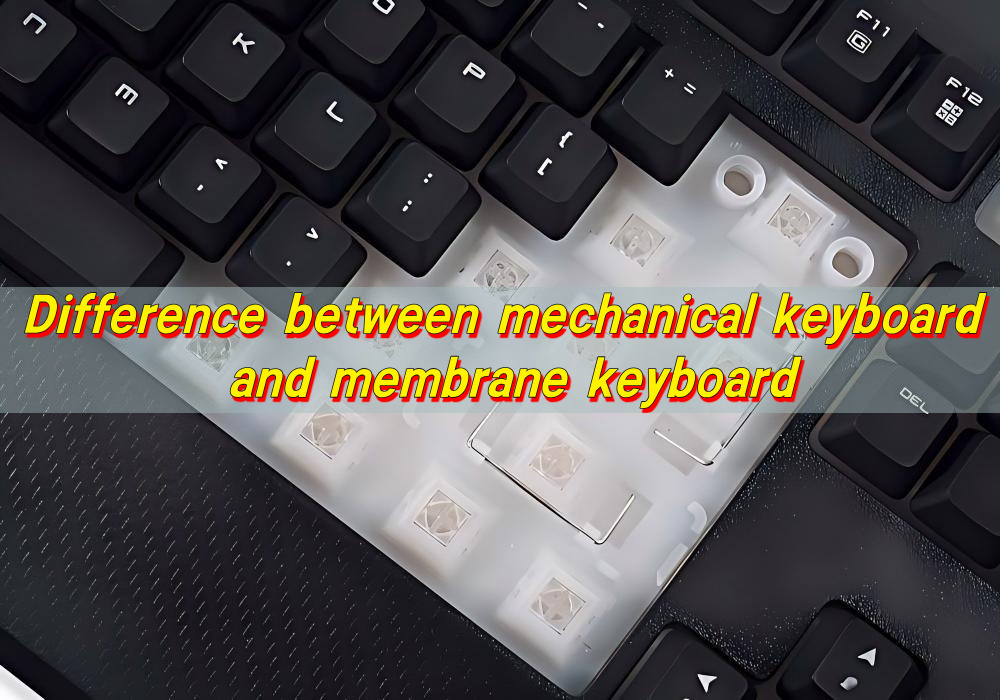
Difference between Mechanical Keyboard and Membrane Keyboard
Choosing between different keyboard technologies is no longer a simple matter of preference. As user expectations continue to evolve—especially in gaming, office productivity, and industrial control systems—the underlying structure of a keyboard plays a decisive role in performance, longevity, and overall user satisfaction. Understanding the difference between mechanical keyboard and membrane keyboard allows buyers and ...
Top Advantages of Using an LGF Membrane Switch in Modern Electronics
Electronics have advanced rapidly over the years. The buttons and controls people use every day have also quietly advanced. Today, thin panel-based controls are replacing old, bulky buttons in almost every industry, and for good reason. Even Lighting Across Every Key Older backlit panels always had that annoying problem of bright spots near the light ...
Contact us online