A Beginner’s Guide to Connecting Membrane Switches to Circuits
A Beginner’s Guide to Connecting Membrane Switches to Circuits
You can connect a membrane switch to your circuit with just a few simple steps. Many beginners find these switches easy to use because of their slim design and flexible layout. This makes installation possible even in tight spaces. Most people prefer the 4×4 style for quick setup and rapid prototyping. You do not need advanced skills to work with a membrane switch connector, so you can focus on hands-on learning right away.
- Membrane keypads are affordable for most applications.
- Their wiring process is straightforward, making them ideal for beginners.
- Flexible keypads support fast learning and experimentation.
Key Takeaways
- Membrane switches are user-friendly and ideal for beginners due to their simple wiring and flexible design.
- Choose the right attachment method, such as connectors or soldering, to ensure a reliable connection for your project.
- Always test each button for continuity before final installation to catch any issues early.
- Handle and store membrane switches carefully to maintain their performance and extend their lifespan.
- Select quality materials and follow best practices to avoid common mistakes and ensure reliable operation.
Quick Start Guide
Steps Overview
You can connect a membrane switch to your circuit by following a few clear steps. Start by identifying the type of circuit in your membrane switch. Most switches use one of three types: polyester circuit, flexible printed circuit (FPC), or rigid PCB (FR4). Polyester circuits work well for commercial projects and cost less. FPC circuits offer strong reliability and support surface-mount components. Rigid PCB circuits provide durability and allow you to solder leads directly.
Next, choose the best attachment method for your project. You might use a breadboard, direct soldering, or a membrane switch connector. Many beginners prefer connectors because they make setup fast and reliable. If your switch has a ZIF tail or crimped housing, use it to ensure a secure connection. This approach helps you avoid loose contacts and makes troubleshooting easier.
💡 Tip: Always double-check the orientation of your membrane switch connector before powering your circuit. This step prevents wiring errors and protects your components.
Safety Tips
When working with membrane switches, you need to keep safety in mind. The table below lists common conditions that can cause safety incidents and how you can prevent them:
| Condition Leading to Safety Incidents | Preventive Measure |
|---|---|
| High pressure | Avoid using under high pressure |
| High humidity | Avoid using under high humidity |
| High temperature | Avoid using under high temperature |
| Impurities in materials | Choose better polyester and silver oil ink |
| Circuit type | Select flex copper or PCB circuits |
| Tightness of membrane switch | Increase tightness; add carbon/UV ink |
You should always work in a dry, cool environment. Select quality materials for your project. Handle the membrane switch gently to avoid damaging the tail or contacts. If you follow these tips, you will reduce the risk of accidents and extend the life of your switch.
Membrane Switch Basics
How It Works
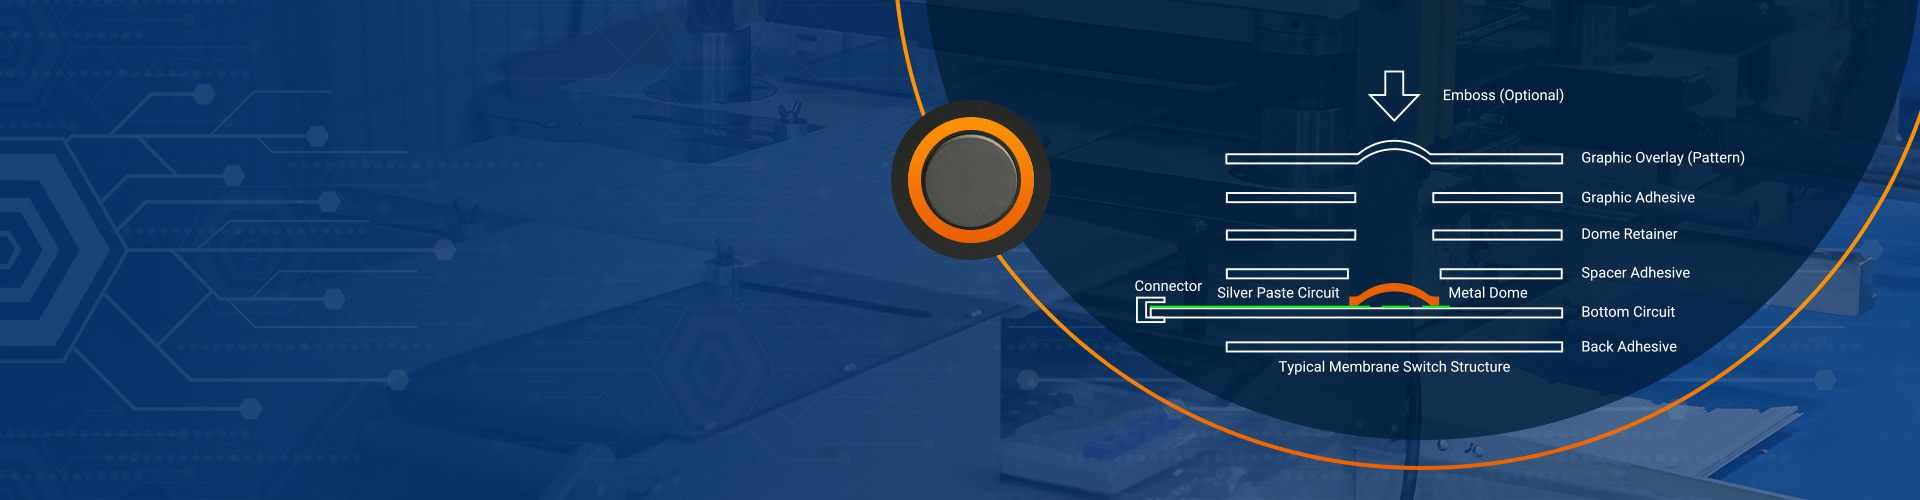
You interact with a membrane switch by pressing its surface. This action triggers a simple but effective process. The switch contains several layers, each with a specific function. When you press the panel, the upper circuit flexes and touches the lower circuit. This contact closes the circuit and sends a signal to your device. The isolation layer keeps the circuits apart when you do not press the switch, preventing accidental activation.
Here is a breakdown of the main components and their roles:
| Component | Function |
|---|---|
| Panel | The top layer that you press to start the switch operation. |
| Upper Circuit | Bends down when pressed and makes contact with the lower circuit. |
| Isolation Layer | Keeps the upper and lower circuits apart when not pressed. |
| Lower Circuit | Completes the circuit when touched by the upper circuit. |
You often find these switches made from materials like polyester, polycarbonate, or polyimide. Polyester offers flexibility and low cost, while polyimide supports complex designs and higher reliability. Polycarbonate provides a balance between durability and cost. These materials help the switch resist dust and moisture, making it suitable for demanding environments.
🛡️ Note: Membrane switches last for 5 to 10 million keystrokes. You can expect several years of reliable use, even with daily operation.
Common Applications
You see membrane switches in many industries because they combine durability with a slim profile. Their sealed surfaces block out dust, moisture, and harsh chemicals, making them ideal for sensitive or high-use environments.
| Industry | Applications |
|---|---|
| Aerospace | Cockpit control panels, avionics, navigation systems |
| Medical Devices | Handheld diagnostic equipment, hospital bed controls, infusion pumps |
| Industrial Controls | Keypads for factory automation, robotics, and process controls |
| Consumer Electronics | Remote controls, microwave panels, calculators, home appliances |
| Security Systems | Access control keypads, alarm system panels |
| Automotive | Dashboard controls, climate control panels, infotainment systems |
| Gaming and Entertainment | Slot machines, arcade games, interactive kiosks |
You might use a membrane switch connector in remote controls, gaming devices, or home appliances. These switches also appear in medical devices and industrial control panels, where reliability and cleanliness matter most.
💡 Tip: Choose a membrane switch when you need a reliable, low-profile interface that can withstand frequent use and exposure to tough conditions.
Pinout and Tail Configuration
Identifying Pinout
You need to understand the pinout of your membrane switch before connecting it to your circuit. Pinout refers to the arrangement of electrical contacts on the tail of the switch. Most membrane switches use either a matrix layout or a common bus layout.
A matrix layout organizes the circuit in a grid pattern. This design reduces the number of pinouts and keeps the membrane switch connector compact. You will see rows and columns, with each button located at the intersection of a row and a column. This method allows you to control many buttons with fewer wires, which simplifies your circuit and saves space. However, a matrix layout often requires multiple print layers inside the switch.
A common bus layout uses one shared lead for all switch positions. Each button connects to this common line and has its own individual track. This approach makes the design simpler and uses only a single print layer. However, you will notice more tracks and pinouts on the tail, which can increase the size of the membrane switch connector.
📝 Tip: Always check the datasheet or labeling on your membrane switch. Manufacturers often provide a diagram that shows the pinout configuration. If you do not have documentation, you can use a multimeter to test continuity and map each button to its corresponding pin.
Tail Length and Exit
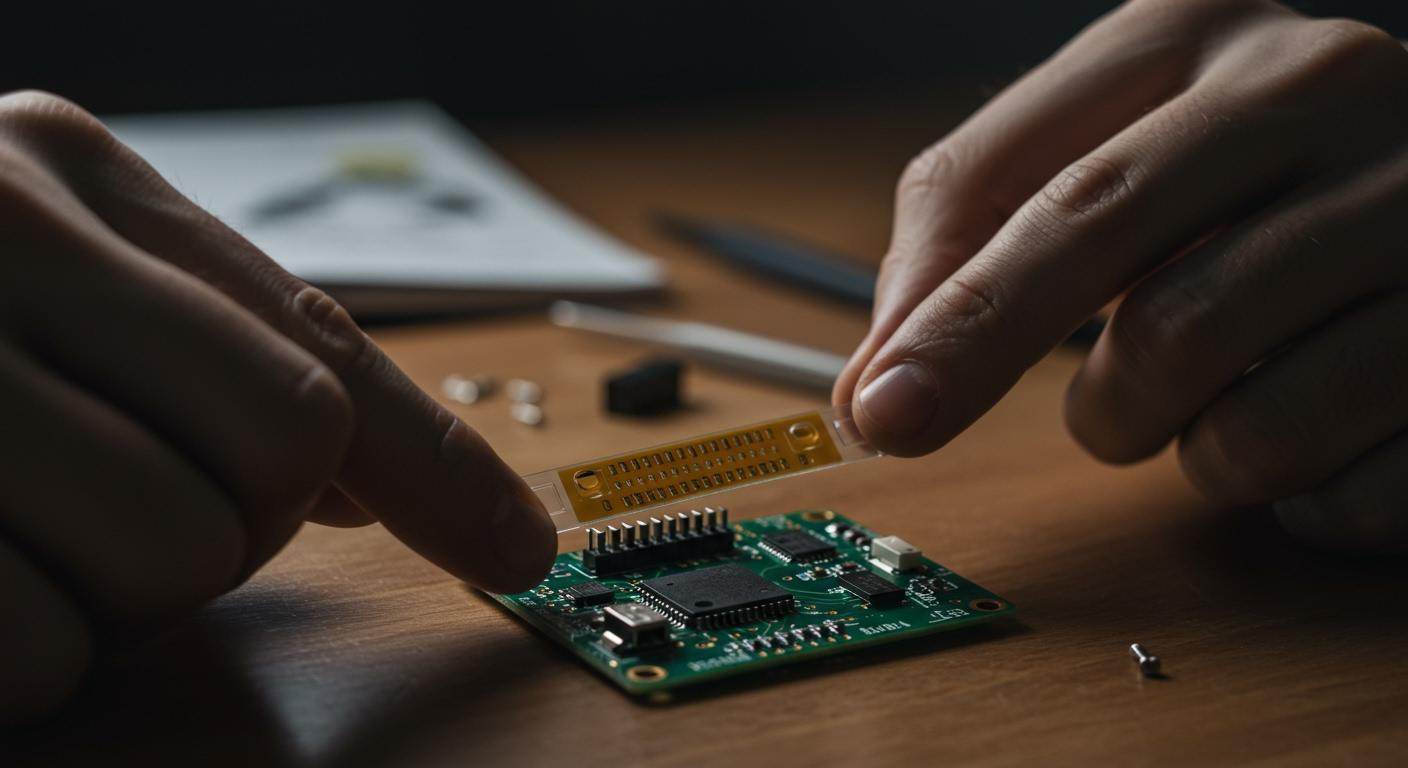
The tail of a membrane switch is the flexible strip that carries the circuit traces from the keypad to your main board. You must pay close attention to both the length and the exit orientation of the tail. These factors affect how easily you can install the switch and how reliable your connection will be.
- The tail exit should match the layout of your device and the position of other electronic components. If the exit points in the wrong direction, you may struggle to connect the membrane switch connector or route the tail without bending it sharply.
- A well-designed tail ensures a stable and secure connection to your circuit. This reliability is essential for the switch to function correctly over time.
- The material and construction of the tail must withstand repeated bending and handling. Durable tails prevent breakage and signal loss, especially in devices that see frequent use.
You should measure the distance from the switch to your circuit board before installation. Choose a tail length that provides enough slack for easy routing but avoids excessive loops or sharp bends. Many membrane switch connector options support different tail lengths and exit styles, so you can select the best fit for your project.
⚡ Note: Never force the tail into a tight space or twist it sharply. Gentle curves and proper alignment help maintain signal integrity and extend the life of your membrane switch.
Membrane Switch Connector Options
When you connect a membrane switch to your circuit, you have several options for making a reliable connection. Each method offers unique advantages and challenges. Your choice depends on your project’s complexity, budget, and long-term needs.
Breadboard Connections
Breadboards provide a fast and convenient way to connect a membrane switch during prototyping or testing. You can insert the tail of the switch directly into the breadboard, which allows you to experiment with different circuit layouts without permanent changes.
| Advantages | Disadvantages |
|---|---|
| Convenient and fast operation | Poor connection stability |
| High safety | Not suitable for complex circuits |
| Suitable for beginners | Poor high-frequency performance |
| Easy to observe and debug | Limited current carrying capacity |
You benefit from easy observation and quick debugging. Breadboards suit beginners who want to learn by doing. However, you may notice that connections can become loose over time, especially if you move the board frequently. Breadboards also struggle with complex or high-frequency circuits. For simple projects and learning environments, this method works well.
💡 Tip: Use breadboard connections for early-stage development or classroom demonstrations. For final products, consider more secure options.
Soldering Methods
Soldering offers a permanent and stable connection between your membrane switch and the circuit. You can solder the tail directly to a PCB or use a header pin for easier replacement. This method ensures strong electrical contact and reduces the risk of accidental disconnection.
You should use soldering when your project requires durability and long-term reliability. Soldered joints withstand vibration and repeated use. However, soldering demands careful technique. Excessive heat can damage the tail or melt insulation. Always use a temperature-controlled soldering iron and work quickly to avoid overheating.
⚠️ Note: Practice on spare materials before soldering your actual membrane switch. This step helps you avoid costly mistakes.
Using FPC/ZIF Connectors
FPC (Flexible Printed Circuit) and ZIF (Zero Insertion Force) connectors provide advanced solutions for connecting membrane switches, especially in compact or high-performance designs. You insert the tail into the connector, which clamps it securely without soldering. This approach protects delicate traces and allows for easy replacement or upgrades.
You gain several benefits from FPC and ZIF connectors:
- FPC membrane switches use advanced printing technology for efficient and flexible circuit connections.
- These connectors offer excellent insulation and heat resistance, which improves overall durability.
- The polyimide base in FPC switches allows repeated flexing without damage, making them ideal for tight spaces.
- FPC switches require physical pressure to activate, ensuring reliable operation even in environments with electrical interference.
- Finer traces in FPC circuits allow you to place exit points closer to components, saving space.
- Ultra-fine pitch ZIF connections support complex designs that standard connectors cannot handle.
FPC and ZIF connectors often cost more than basic options, but they deliver superior performance in demanding applications.
Choosing the Right Connector for Your Application
Selecting the best connector type for your membrane switch involves several factors:
- Pitch Size: You must match the pitch size (the distance between contacts) to your circuit. Available sizes range from 0.20 to 2.00mm.
- Circuit Size: Consider how many circuits your application needs. Options range from 2 to 120 circuits.
- Application Parameters: Think about your device’s environment, required durability, and space constraints.
Cost also plays a role in your decision. The table below compares the cost-effectiveness of common connector types:
| Connector Type | Cost-Effectiveness |
|---|---|
| Snap Connectors | More cost-effective |
| Wire Harnesses | More cost-effective |
| FPCs/FFCs | Generally more expensive |
| Standard Membrane | More cost-effective |
| PCB Membrane | Typically more expensive |
You should balance your budget with your project’s technical needs. For simple, low-cost devices, snap connectors or wire harnesses may suffice. For advanced electronics or environments that demand high reliability, FPC or ZIF connectors justify their higher price.
🛠️ Tip: Always review your project’s requirements before choosing a membrane switch connector. The right choice ensures long-term performance and reduces maintenance.
Circuit Integration
Matrix vs. Common Bus
You need to choose the right circuit configuration for your membrane switch. The two most common options are matrix and common bus layouts. Each method offers unique benefits for different applications.
| Configuration Type | Description |
|---|---|
| Common Bus | Connects multiple switches using a single line, suitable for fewer switches and simpler layouts. |
| Matrix | Uses an X-Y grid to connect switches, significantly reducing the number of tracks needed. |
A common bus setup works well when you have a small number of switches. You connect all switches to a single shared line, which keeps the design simple. This method makes troubleshooting easy and reduces wiring complexity for basic projects.
A matrix configuration uses a grid of rows and columns. Each button sits at the intersection of a row and a column. This design allows you to control many switches with fewer wires. You save space and reduce clutter, especially in larger keypads. Matrix layouts suit projects that require multiple buttons and efficient use of circuit traces.
💡 Tip: For projects with more than a few buttons, a matrix layout helps you keep your circuit compact and organized.
Multilayer Circuitry
You can enhance your membrane switch by using multilayer circuitry. This approach stacks several circuit layers within the switch. Each layer can carry different signals or support extra features.
Multilayer designs allow you to integrate advanced components, such as LEDs or microchips, directly into the switch. You gain improved durability and tactile feedback. This structure also supports features like backlighting, which makes your interface easier to use in low-light conditions. Complex devices often rely on multilayer membrane switches for their versatility and reliability.
🛠️ Note: Multilayer circuitry lets you build sophisticated control panels without increasing the size of your device. You can add more functions while keeping your design slim and user-friendly.
Testing and Troubleshooting
Continuity Testing
You need to verify the integrity of your membrane switch circuits before final installation. Circuit continuity testing helps you confirm that each button and trace works as intended. This process checks for any breaks or interruptions that could cause your switch to malfunction. You can use a digital multimeter set to continuity mode. Place one probe on each end of the circuit trace or across the switch contacts. If the circuit is intact, the meter will beep or show a low resistance value. If you do not get a signal, you may have a broken trace or a faulty connection.
🔎 Tip: Always test each button individually. This step ensures every part of your membrane switch responds correctly and helps you catch issues early.
Continuity testing gives you confidence in the reliability and functionality of your membrane switch. You can quickly identify and fix problems before they affect your project.
Common Issues
You may encounter several issues when testing membrane switches. Recognizing these problems and knowing how to resolve them will save you time and frustration.
| Issue | Symptoms | Possible Causes | Solutions |
|---|---|---|---|
| Poor Touch Sensitivity | No response or feedback when pressed | Conductive Material Issues, Damaged Key Membrane, Circuit Design Issues | Inspect Conductive Layers, Optimize Design, Use High-Quality Membrane Materials |
| Air Bubbles or Wrinkles | Development of air bubbles or wrinkles | Material Defects, Environmental Factors, Improper Storage | Optimize Production Environment, Select Suitable Materials, Improve Storage Conditions |
| Fading or Peeling of Coating | Fading, peeling, or flaking of buttons | Poor Ink Quality, UV Exposure, Physical Wear | Use High-Quality Ink, Apply Surface Protective Coatings, Avoid Long-Term Exposure to Sunlight |
| Poor Waterproof Performance | Moisture penetration damaging internal components | Improper Sealing, Inappropriate Materials | Improve Sealing Design, Choose Waterproof Materials, Conduct Waterproof Testing |
| Short Circuits or Open Circuits | Device malfunction due to circuit issues | Damaged Conductive Layer, Poor Manufacturing Process, External Damage | Inspect Circuit Design, Enhance Circuit Durability, Strengthen External Protection |
You might also face these frequent troubleshooting scenarios:
- Unresponsive buttons: Check all connections, clean the switch, and test continuity.
- Erratic behavior: Inspect for physical damage, reset your device, or update the software.
- Ghosting (multiple buttons registering at once): Review wiring, insulate neighboring buttons, or use a shielded switch.
If you need extra help, you can turn to online communities such as Arduino and Adafruit forums. These platforms offer advice, tutorials, and code examples. You can also experiment with SOUSHINE membrane switches and share your experiences with others. When problems persist, verify your code and consider replacing the keypad.
💡 Note: Careful testing and troubleshooting ensure your membrane switch delivers reliable performance in every project.
Practical Tips
Handling and Storage
You should always handle membrane switches with care to maintain their performance and lifespan. Hold the switch by its edges and avoid touching the contact areas or traces. Store unused switches in anti-static bags or original packaging to prevent dust buildup and static damage. Keep them flat to avoid bending the tail or causing creases in the layers.
Environmental conditions play a key role in storage and operation. Choose a dry, cool location away from direct sunlight. High humidity, extreme temperatures, and exposure to chemicals can degrade the materials and adhesives. Waterproof membrane switches offer extra protection in moist environments, but you still need to avoid prolonged exposure to water.
To keep your membrane switch clean and responsive, follow these steps:
- Power off and unplug your device before cleaning.
- Use a soft-bristle brush or dry cotton swab to remove dust.
- Dampen a cotton swab with isopropyl alcohol or electrical contact cleaner.
- Gently clean the surface in a circular motion.
- Wipe with a microfiber or lint-free cloth.
- Let the switch air-dry or use a hairdryer on a cool setting.
- Test the switch after cleaning.
🧼 Tip: Regular cleaning prevents buildup that can affect touch sensitivity and reliability.
Avoiding Mistakes
Many beginners make avoidable mistakes when connecting membrane switches. You can prevent most issues by following best practices and checking your work.
| Common Mistakes | Solutions |
|---|---|
| Poor Dome Placement | Center the metal dome over the contact point. |
| Ignoring Environmental Factors | Plan for waterproofing and dust protection. |
| Incorrect Overlay Design | Select materials and adhesives that match your device’s environment. |
| Inconsistent LED Spacing | Use light guide films for even brightness. |
| Wrong Circuit Design | Simplify the circuit and use proper trace sizes. |
Other frequent problems include weak touch response, air bubbles, fading overlays, and water ingress. You can avoid these by choosing quality materials, maintaining a clean workspace, and reinforcing seals. Regularly inspect your circuit for damage or loose connections.
⚠️ Note: Careful planning and attention to detail help you avoid costly errors and ensure your membrane switch works reliably in any application.
You can connect membrane switches to circuits with confidence. These switches feature a user-friendly design, simple operation, and straightforward mechanisms that make them easy for beginners to use. Experiment with different setups to build your skills. Always double-check your work for safety and reliability:
- Test each key to ensure it registers correctly.
- Perform quality control tests to confirm flawless function.
Try adding a membrane switch to your next project and see how simple and rewarding the process can be.
FAQ
How do you clean a membrane switch safely?
You can clean a membrane switch by powering off your device. Use a soft, dry cloth or a cotton swab with isopropyl alcohol. Gently wipe the surface. Avoid soaking the switch or using harsh chemicals.
Can you repair a damaged membrane switch tail?
You cannot usually repair a damaged tail. If the tail breaks or loses conductivity, you should replace the entire switch. Attempting to fix it may cause further damage or unreliable performance.
What tools do you need to connect a membrane switch?
You need a multimeter for testing, a breadboard or connector for prototyping, and a soldering iron if you want a permanent connection. Use tweezers for precise handling and a screwdriver for mounting.
Why does your membrane switch not register key presses?
You may have a loose connection, a damaged trace, or dirt on the contacts. Check all wiring, clean the surface, and test each button with a multimeter. Replace the switch if problems continue.
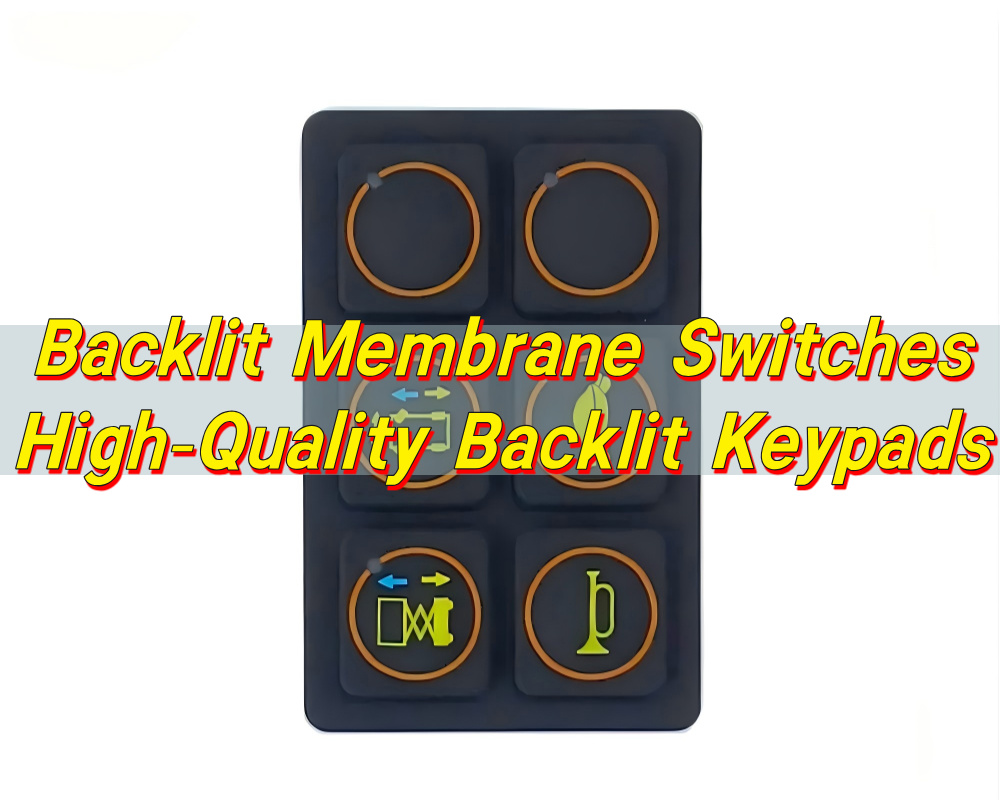
Backlit Membrane Switches – High-Quality Backlit Keypads
We provide reliable backlit membrane switches with long service life, stable backlight, and customizable design to fit your device control panel. What are backlit membrane switches? Backlit membrane switches are low-profile control interfaces that combine printed circuitry with integrated lighting. They allow users to see and operate equipment in low-light or dark environments. A backlit ...

Membrane Switch with LED, Customized LED Membrane Switches
Our LED membrane switches provide bright, even backlighting, long lifespan and reliable performance for control panels in dark environments. What are LED membrane switches? LED membrane switches are advanced user interface panels that combine a flexible membrane circuit with integrated light sources. The structure looks simple from the outside. Inside, it is a layered system ...

Click Touch Membrane Switch, Premium Membrane Switch with Tactile Click Response
Our click touch membrane switch provides clear tactile click response, stable performance and long service life, ideal for control panels requiring obvious touch feedback. What is a click touch membrane switch? A click touch membrane switch is a pressure-activated interface designed to deliver a clear, physical response each time a key is pressed. Unlike flat ...
Contact us online